Archive for September, 2014

Goalie training in IP2

Posted: September 30, 2014 in Uncategorized

Each team in IP2 will be assigned a full set of goalie gear (leg pads, right handed blocker and trapper and a dangler neck protector) in a bag. I look after the goalie sticks and have one set of left handed blocker and trapper. I will get more of these (hopefully). Each team (parent rep or designate)  is responsible for bringing the gear to every practice and game. DO NOT GIVE IT TO THE GOALIE TO BRING TO AND FROM THE RINK. If that player is absent then the equipment will not be available of the team. Goalie gear can not be borrowed at the end of the season. This decision was arrived at largely because  one team has yet to return it from last year’s IP2.  The practice of loaning gear over the summer for summer hockey is suspended. The plan in IP2 is to begin to train goalies starting the first practice in November. I hope that any player who wants to try being a goalie has the chance. Historically as the season goes on usually one or two players on the team show extra interest. It is not the intention of the Initiation program that teams always dress the same player as the goalie. Players dressing as a goalie will need some extra time to get dressed.

There is no goalie training in IP1. The emphasis will be on skating and other hockey skills.
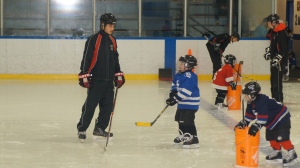
 

What’s with those black pucks?

Posted: September 30, 2014 in Uncategorized

Some of you might have noticed a few (10) black pucks mixed in with the normal  blue pucks we use. Hockey Canada mandates the use of the lighter blue pucks. The black ones  were actually foam pucks I wanted to try out. I wanted a potentially safer way to teach our goaltenders but wanted to verify that these foam pucks worked like the blue ones. Note: More on how we will train goalies in a later blog. For the record I am now a huge fan of these foam pucks and I will buy a bunch more. I personally buy the equipment we use on ice in IP1 and IP2 so I try to be careful not to make bad decisions – (Vesey family bankruptcy is not an option!) The science guy in me also likes to try things out before I fully commit to using them. From time to time you will see different items appearing on ice – usually during warm up just to see how they work and how the players respond to them.

I thought I would share this link on the blog:

www.youtube.com/watch?v=cXhxNq59pWg

There is already some discussion about when games will use full ice and when “Fun games” in other leagues will start.

There are some simple rules laid out by Hockey Canada:

No games are allowed until late November

There is no score kept in games, no winners and no champions in Initiation hockey.

Ice is extremely limited and expensive ($230 per 50 minutes). The NMHA gets us as much ice as they can given the restrictions of the amount of money paid at registration. I have lots of plans for fun activities for our players and their families. Once these have been approved they can be sanctioned  and the information passed on to all of you. Fun tournaments will not be one of these activities. There will be no “Fun tournament” where other Initiation teams come to play with us. Some associations will have them but be warned they are very expensive based on what the players will get out of it.

I thought I would share this link on the blog:

www.youtube.com/watch?v=cXhxNq59pWg

I laugh every time I see it. It is what “full ice” looks like to a young child – In the video they compare it to an eight year old’s view…Double the rink size in the video to get what it looks like to a 4 or 5 year old!

This is one main reason why our games will be across the ice so that players can be actively involved.

Since games do not start until late November I will not go over the organization until a little closer to that date.

See you Saturday!

Hockey videos are ready for viewing

Posted: September 23, 2014 in Uncategorized

Last year I began a process to create a series of youtube based videos designed to help people new to hockey get some of their questions answered. This was made possible by the volunteer efforts of Errol Morel – our videographer. To date we have finished 5 videos and are working on 7 more. This year’s instructors have committed to complete the project.Four of the videos are on the NMHA website on the left side of the main page. The rest will be added as soon as they are done. Our current list includes:

Choosing the correct equipment

How to choose and tape a stick

How to successfully start to skate

What to expect from a Timbit practice – or just how much equipment does coach Dave have in his van?

Eliminating the mystery in skate sharpening

How to dress a goalie

How to stick handle

How to shoot

How to score

How to get more power in forward skating

How to skate backwards

How to stop


IP2 Practice outline Sept 27, 2014 Bell Arena 3- 8

(Note: IP2 Merivale Arena  9 – 1 – their practice outline is on a separate blog)

Based on our first practice it is obvious there is a fairly wide range in skating ability. Our challenge will be to bring the weaker skaters along while still pushing the more developed skaters to improve. The “Orange buckets” have improved so much already!! We have 32 practices this year – lots of time to get them ready for a life time of hockey.

Equipment needed for 50 minute practice):

10 Ringette rings

50+ Pucks

4 Pylons

Plungers, wiffle balls and two buckets

2 PVC Goalies


WARM UP SKATE: (5 minutes)

Skate with wiffle balls (turn the nets so they will not be encouraged to shoot)

ALL IN ONE END (Less than 15 minutes of skating activities – all there and back)

  • Fast as you can
  • Hop every line
  • Fall at every line and get up
  • Skate to red line and two foot glide to the end with stick across the knees
  • Skate to the red and ONE FOOT glide to the end – They will find this hard!
  • Scull (inside outside)
  • Fast as you can

ACTIVITY STATIONS – 3 groups (8 minutes per station)

Note orange buckets will work as the fourth group in their own area between the ringette line and the red line

  1. Shark skate with ringette rings inside a faceoff circle.

GOAL: This develops balance, lowered stance, edge control, puck protection, collision avoidance and rapid first steps.

Location – Both faceoff circles at one end.

VOCAB: “ Sharks have to keep skating to survive. I want you to keep skating without bumping into each other or losing your ring. You cannot leave the circle.”

  1. Cross ice skate and shot on net (PVC Goalie in place)

Location: Across ice on one side of the red line.

GOAL: To develop basic stick handling and shot on net “where the goalie isn’t!”

VOCAB: “ Skate across the ice stick handling the puck and try to score on our goalie. Remember shoot where the goalie isn’t! Once you have shot, join the line to come back and shoot on the other net.”

  1. Plunger ball – Each player uses a plunger to retrieve wiffle balls shot into the corner.

Location: Inside the ringette line on one end

GOAL: This develops rapid first steps, balance, lowered stance.

VOCAB: “ This is a race – go get the wiffle balls by pushing down on the plunger and return the balls to the bucket as quickly as you can.”

WRAP UP GAME: Freeze tag – instructors are “it”.

TUNNEL UP AND SAY GOODBYE.


IP2 Practice outline Sept 27, 2014  9 – 1 Merivale Arena (Note: IP1 Bell Arena  3-8 – their practice outline is on a separate blog)

Based on our first practice it is obvious there is a fairly wide range in skating ability. Our challenge will be to bring the weaker skaters along while still pushing the more developed skaters to improve. We have 32 practices this year – lots of time to get them ready for a life time of hockey.

Equipment needed for 50 minute practice):

10 Ringette rings

50+ Pucks

22 Pylons

Plungers, wiffle balls and two buckets

2 PVC Goalies

WARM UP SKATE: (5 minutes)

Skate with pucks (turn the nets so they will not be encouraged to shoot)

ALL IN ONE END (Less than 15 minutes of skating activities – all there and back)

  • Fast as you can
  • Hop every line
  • Fall at every line and get up
  • Skate to red line and two foot glide to the end with stick across the knees
  • Skate to the red and ONE FOOT glide to the end
  • Scull (inside outside)
  • Stop at every line and look at the stands
  • Fast as you can

ACTIVITY STATIONS – 4 groups (6 minutes per station)

  1. Shark skate with ringette rings inside a faceoff circle. Location – Both faceoff circles at one end.

GOAL: This develops balance, lowered stance, edge control, puck protection, collision avoidance and rapid first steps.


VOCAB: “ Sharks have to keep skating to survive. I want you to keep skating without bumping into each other or losing your ring. You cannot leave the circle.”

  1. Figure eight skate and glide – each player will skate around their own set of two pylons placed 20 feet apart. Location:  Red line to blue line at one end.

GOAL: This develops inside edge pressure to initiate a turn.

VOCAB: “I want you to skate as fast as you can to the pylon and GLIDE AROUND IT then skate to the other pylon and GLIDE AROUND IT in the opposite direction. This is called a figure eight skate – remember to glide not skate around the pylon.”

  1. Cross ice skate and shot on net (PVC Goalie in place) Location: Across ice on one side of the red line.

GOAL: To develop basic stick handling and shot on net “where the goalie isn’t!”

VOCAB: “ Skate across the ice stick handling the puck and try to score on our goalie. Remember shoot where the goalie isn’t! Once you have shot join the line to come back and shoot on the other net.”

  1. Plunger ball – Each player uses a plunger to retrieve wiffle balls shot into the corner. Location: Inside the ringette line on one end

GOAL: This develops rapid first steps, balance, lowered stance.

VOCAB: “ This is a race – go get the wiffle balls by pushing down on the plunger and return the balls to the bucket as quickly as you can.”

WRAP UP GAME: Freeze tag – instructors are “it”.

TUNNEL UP AND SAY GOODBYE.

No one wants to see Timbit tears!

Posted: September 23, 2014 in Uncategorized

No one likes to see Timbit tears. It is very important to handle tears in a way that will not jeopardise the player’s love of hockey and future opinion on physical activity as a lifestyle. Timbits are young and for many the ice is a scary place – away from mom and dad. I cannot stop a child from crying but I can do a few things to help the situation:

  1. I can ask them why they are crying… and listen to what is really bothering them.
  2. I can promise them that my only job is to make them the best skater possible.
  3. I can promise them that I will never force them to do anything.
  4. I can remind them that all anybody can ask of them is that they try and that everyone learns at a different pace.
  5. I can reassure them that lots of people who stared just like them became really good skaters.
  6. I can promise them that their instructors will never be mean to them.
  7. … and I cannot give in on the first tear… because sometimes people just need a push away from that escape hatch.

Based on 35 years of teaching and coaching I can guarantee that everyone can learn to skate and have fun on ice. Both my instructors and our Timbits have done a great job in their first practice session. It will be a season of big smiles.

Pictures from Sept 11 Rookie skate

Posted: September 15, 2014 in Uncategorized

Feel free to send me photos you would like to share of our Timbits. As long as we do not identify them we should be OK

SONY DSCSONY DSCSONY DSCSONY DSC

AT LAST….. OUR FIRST OFFICIAL TIMBITS IP1 PRACTICE Teams 9 – 18 !
For the parents and instructors reading this – Every week I will publish the outline for the practice with its goals, activities and rationale. The hope is that parents will see why we do what we do and instructors will get an advanced explanation so they can be prepared to work with the Timbits.
Practice 1 Sept 20 5 – 12 Merivale Arena IP1 (first year) (about 38 players) teams 9-18
You will notice that teams 1-8 are IP2 and the higher numbered teams are actually IP1

We will have 7 instructors and hopefully 2 parent reps on ice
50 minutes of ice time – we will clean between the hours

We saw most of these players at the sorts. Less than half required skating aids so it is safe to plan for 12 skating aid players and 26 players without them. We will still need to get them safely and confidently on ice. We will still need to check all their equipment but especially skates, sticks, neck guards and mouth guards.
MAJOR GOALS:
1.To evaluate the starting point for their skating skills
2.To show them the way a typical practice will be organized and the behaviour and safety issues that need to follow
3. To work on basic skating

WARM UP SKATE (Hopefully only 5 minutes but that will depend on how quickly we can get them all on the ice). Instructors it is always important for you to interact with the players so be upbeat, encouraging and personally engaging.

ALL IN AT CENTRE ICE (5 minutes)
Welcome and introductions
Equipment safety, what to do when they are hurt or tired or upset or thirsty
Review – What to do when they fall and how to get up

Orange buckets to one end and the rest to the other end
ALL IN ONE SIDE FROM BLUE LINE TO ICING LINE (15 minutes)– skate across the ice – orange buckets will be inside the blue line for the rest of the practice
2 x There and back as fast as they can
2 x There and back pushing with one foot …..SUPER IMPORTANT
2 x There and back – skate to half way then lift one foot then the other
2 x There and back skate to half way and glide to the boards on two feet
2 x There and back feet apart and together
2 x There and back as fast as you can

DIVIDE INTO THREE STATIONS (Rotate 1 to 2 to 3 to 1 etc) (about 8 – 9 per station)
5 minutes on task – so get organized!!
1. STOPPING inside the blue line
This is one of the most important foundational skills to teach so go slowly.
Players skate towards the boards and turn to stop and lift their back foot.
VOCAB: “I know some people think this is hard but I have a trick …skate forwards and then turn and lift your back foot. It doesn’t matter which way you turn just make sure you lift your back foot.”
2. TIRE PUSH across the ice between the blue and red lines
Partners – one pushes the tire across the ice with the blade of their stick in the centre (while partner follows) and their partner pushes it back.
VOCAB: “Push hard, Let me hear your skates dig in”
3. RINGETTE RINGS THROUGH THE PYLONS in the area between the bred and blue line
This is about finding out if players can turn both sides. Later we will add the fact that their arms help them turn.
Arrange the pylons in a wide serpentine path in three lines (6 pylons per line) This way three players can go at once making three right and three left turns with the ringette ring.
VOCAB: : “Turn your stick over so the butt end is in the ring, I want you to skate as fast as you can going around the pylons like a snake .
Don’t lose the ring PUSH DOWN ON IT. When you get to the other side wait.”
WRAP UP GAME: (5 minutes) FREEZE TAG Instructors are “it” first and if time the players will be “it”.
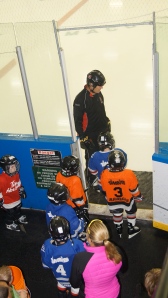
TUNNEL UP AND SAY GOODBYE – personal congrats to everyone!

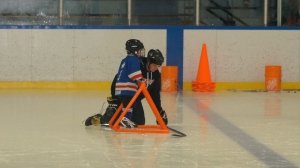
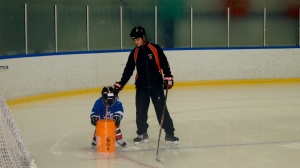
ORANGE BUCKETS DAY 1 (inside the blue line) Both parent reps and 2 instructors
NOTE: It is important that they realize that they are having their own practice not just pushing buckets!
NO STICKS REQUIRED
We need to develop three things
1.Bending knees, staying low and turning their feet so the side of their blade digs in
2.Pushing harder on one side or the other to turn
3.Balance and confidence off the bucket
Activities:
1.Bucket march in place
Players lift one foot then another to the command right… left…right… left
VOCAB: “I want you to march like a soldier lift one foot then the other but do not push the bucket.”
2.Bucket merry go round
Players put one hand on the bucket and walk around it
VOCAB: “Now I know you can march I want you to hold on to the bucket with one hand and walk around it. Do it both ways.”
3.Bucket push
Push the buckets back and forth across the ice
VOCAB “Bend your knees, turn your feet to the outside and push hard!!”
4.Bucket soccer ( 1 ball per person)
VOCAB: “ Push your soccer ball all the way across the ice and back. Keep the ball on your bucket don’t hit it.”
5.Bucket circle push
VOCAB: “Push your bucket around the outside of the circle using your outside leg only.”
6.Bucket slalom through pylons
VOCAB: “ Push the bucket around the pylons .”
7.Buckets assemble or bucket push with some friends?
VOCAB: “This is like the Transformers … I want you to bring all your buckets together and push.”

At the end of this try to get them to skate at least a little without buckets.

For the parents and instructors reading this – Every week I will publish the outline for the practice with its goals, activities and rationale. The hope is that parents will see why we do what we do and instructors will get an advanced explanation so they can be prepared to work with the Timbits.
Practice 1 Sept 20 8 – 12 Merivale Arena IP2 (second year) (about 38 players) teams 1- 8
We will have 8 instructors and hopefully 2 parent reps on ice
50 minutes of ice time – we will clean between the hours

This is our first time with these skaters so getting them safely and confidently on ice will be important. We also will need to check all their equipment but especially skates, sticks, neck guards and mouth guards. Not sure if we have any beginning skaters … we will see!
MAJOR GOALS:
1.To evaluate the starting point for their skating skills
2.To show them the way a typical practice will be organized and the behaviour and safety issues that need to follow
3.To get them used to the fact that we will be using “different” things on the ice. Although we will only use a few – wiffle balls, tires and ringette rings – MUCH MORE TO COME

WARM UP SKATE with wiffle balls (Hopefully only 5 minutes but that will depend on how quickly we can get them all on the ice). This is the first time for instructors to interact with the players so be upbeat, encouraging and personally engaging.

ALL IN AT CENTRE ICE (5 minutes)
Welcome and introductions
Equipment safety, what to do when they are hurt or tired or upset or thirsty
What to do when they fall and how to get up

ALL IN ONE END (Let’s see them skate!) (15 minutes)
There and back as fast as they can
There and back pushing with one foot
There and back skate to blue – glide on two feet to blue, skate to the end
There and back feet together apart together apart
There and back hop over every line
There and back fall at every line on two knees
There and back as fast as they can

DIVIDE INTO FOUR STATIONS (Rotate 1 to 2 to 3 to 4 to 1 etc) (about 9 – 10 per station)
5 minutes on task – so get organized!!
1.SKATE AND SHOOT (2 nets) two lines of players just outside the faceoff circle on both sides come in on their net and take a one timer. This is more about skating than shooting. It is designed to teach them to skate to the puck and shoot. It is also designed to see if their stick is the right hand – some players are not sure if they shoot right or left. (one instructor and one parent)
VOCAB “Watch the puck, Skate hard to the puck, Don’t wait – just shoot at the net as hard as you can.. then go to the back of the line” Remember these players will all want to shoot a puck in their first practice – so have some fun)
2.TIRE PUSH across the ice between the blue and red lines
Partners – one pushes the tire across the ice with the blade of their stick in the centre (while partner follows) and their partner pushes it back.
VOCAB: “Push hard, Let me hear your skates dig in”
3. BACKWARD SKATING across the ice between the blue and red line
All players can go at once when they start coming back there is the danger of collisions – Be careful!
Teach C cuts and explain why they work.
This is one of the hardest foundational skills to teach so go slowly.
Let players keep their sticks for now – even if they tripod them – moving their feet is the focus for now.
VOCAB: “Skate backwards using a C cut, Go slowly and push hard, Stick your “tail” (NOT BUM!) out a little and keep your head up. Make sure you don’t bump into anyone else’s tail!”
4.RINGETTE RINGS THROUGH THE PYLONS in the area inside the ringette line
This is about finding out if players can turn both sides. Later we will add the fact that their arms help them turn.
Arrange the pylons in a wide serpentine path in four lines (6 pylons per line) This way four players can go at once making three right and three left turns with the ringette ring.
VOCAB: : “Turn your stick over so the butt end is in the ring, I want you to skate as fast as you can going around the pylons. Don’t lose the ring. When you get to the other side wait.”

WRAP UP GAME: (5 minutes) FREEZE TAG Instructors are “it” first and if time the players will be “it”.

TUNNEL UP AND SAY GOODBYE – personal congrats to everyone!